

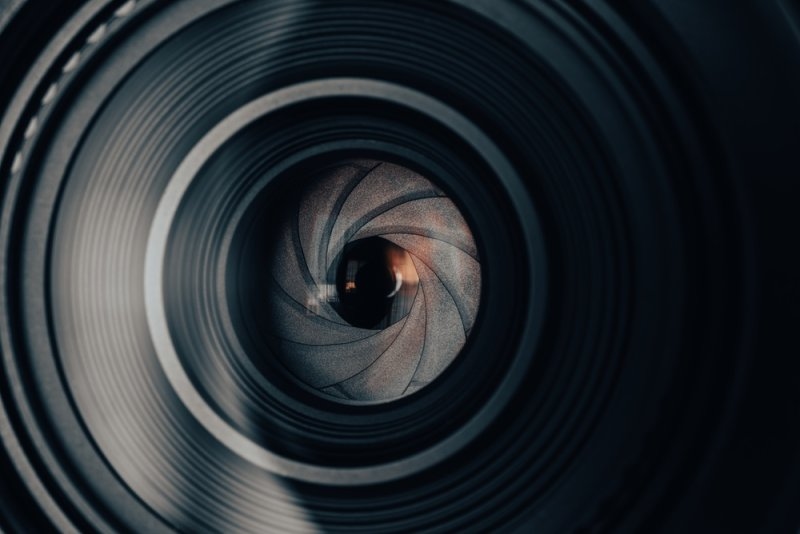
I still remember the first time I noticed a portrait where the background just disappeared into soft color while the person's face stayed razor sharp. That's aperture at work, and once you know how it functions, you start seeing it everywhere. It's a small dial or setting, but it quietly runs the show behind light, focus, and mood in almost every photo you take. This guide walks through aperture photography without the textbook stiffness, so you can actually put it to use the next time you're out shooting.
What is aperture in photography, in the simplest terms possible? It's the opening in your lens that light travels through on its way to the sensor. People compare it to a pupil a lot, and honestly, that comparison holds up pretty well. Wide open in dim rooms, narrow under a bright sun. That single opening does two jobs simultaneously—it sets your brightness, and it decides how much of the frame ends up in focus.
Nothing mysterious is going on inside there. Camera aperture is controlled by a small ring of overlapping blades tucked inside the lens barrel, and they physically move when you change your setting. Open the blades wider, and more light gets through. Close them down, and that light gets choked off fast. All of this happens in a fraction of a second, working alongside your shutter speed to land the exposure you're after.
Must Read: Camera Settings for Beginners: Manual Mode Made Simple
Aperture explained without the jargon: wide settings help in dim rooms and give you that blurred-background effect people love. Narrow settings work better outdoors when you want everything, near and far, looking sharp. Neither is "better" on its own—it just depends on the shot in front of you. This table sums it up quickly.
| Aperture Setting | Light Let In | Depth of Field | Common Use |
| f/1.8 – f/2.8 | High | Shallow | Portraits, low light |
| f/4 – f/5.6 | Moderate | Medium | Street, events |
| f/8 – f/11 | Lower | Deep | Group shots, architecture |
| f/16 – f/22 | Lowest | Very deep | Landscapes, scenics |
F-stop photography confuses nearly everyone at the start. The numbers feel backwards, and nothing about them screams "intuitive." Give it time, though. It clicks eventually, usually somewhere around the tenth time you check your settings mid-shoot.
Most cameras run through something like f/2, f/2.8, f/4, f/5.6, f/8, f/11, f/16, and f/22. Move one step along that line, and you're either doubling or cutting the light in half compared to the setting right next to it.
So, what do f-stop numbers mean in photography once you get past the basics? Technically, it's a ratio—focal length divided by the width of the opening. Practically, just remember this: smaller number, wider hole, brighter picture. That's really all you need day to day.
Cameras rarely jump straight from f/5.6 to f/8 these days. You'll see smaller steps in between, things like f/6.3 or f/7.1, sitting there on your dial. They're handy when a full stop feels like too big a jump, and you just need a slight nudge.
How does aperture affect photography beyond simple brightness? It's pulling double duty on every shot—controlling exposure and sharpness at the exact same time, which is honestly part of why it's such a useful setting to learn early.
Aperture and exposure are tied together pretty tightly. Crank the aperture open and your photo brightens almost immediately. Close it down, and things darken fast, unless shutter speed or ISO steps in to make up the difference.
This is where aperture and depth of field really matter. How does aperture affect depth of field in a real shot? Set your lens to f/2, and the background practically vanishes. Switch to f/16, and now the flowers up close and the hills way in back both look sharp.
That soft, creamy blur behind someone's face in a portrait has a name—bokeh—and it comes almost entirely from a wide aperture doing its job well. Portrait and product photographers lean on this constantly to pull attention exactly where they want it.
If you're wondering how to use aperture in photography without wrestling with menus every time, start with Aperture Priority mode. You choose the f-stop, and the camera figures out shutter speed on its own. It's genuinely that simple to get going.
Try f/2.8 for portraits and watch the person practically pop off the frame. Their eyes stay crisp while everything behind them softens into a gentle wash.
Go narrower for landscapes, somewhere around f/11 or tighter. A gorgeous mountain range loses a lot of its impact if the foreground rocks or distant peaks turn fuzzy.
Shooting handheld after dark? A wide aperture like f/1.8 becomes your best friend fast. It pulls in extra light so you're not forced to push ISO into grainy, noisy territory.
Top Pick: Best Camera Lenses Guide for Photography Enthusiasts
People ask this constantly: what aperture should I use for photography today? There isn't a single right answer, which honestly frustrates beginners more than it should. It comes down to your subject, your light, and the look you're chasing in that moment.
A lot of people pick one aperture early on and just leave it there forever, which is a bit like driving everywhere in first gear. Also, cranking all the way to f/22 can actually soften your image slightly—a surprise for plenty of beginners the first time it happens.
Aperture photography feels like a lot at first, with backwards numbers and terms that don't explain themselves. Spend a few real sessions with it, though, and it starts feeling second nature. Once f-stops, depth of field, and exposure settle into place in your head, reaching for the right setting stops being a decision and just becomes a habit. Grab your camera and try it out—you'll notice the difference in your very next shot.
It's basically the hole inside your lens that opens and closes to let light through, and it also decides how much of your shot stays in focus. You'll see it written as f-stops, f/2.8 or f/16, or that sort of thing. The confusing part is that a smaller number actually means a bigger opening.
Actually, less. It's backwards from what you'd guess. f/16 closes the opening down and blocks a lot of light, while something like f/2.8 opens it way up and lets a ton more in.
You'll want to shoot wide open, somewhere around f/1.8 to f/4. That's what gives you that soft, blurred-out background while your subject's face stays crisp. Pretty much everyone shooting portraits is chasing that look.
Go the other direction here; f/11 or f/16 is usually the sweet spot. You want everything sharp, the flowers by your feet all the way to the mountains way off in the distance.
It's one of the main things controlling how bright or dark your photo turns out. Open the aperture, and the shot brightens almost instantly. Close it down and things get darker, so you'll probably need to adjust your shutter speed or bump the ISO to make up for it.
This content was created by AI